Cobra 29 LX Manual: A Comprehensive Guide (Updated 01/09/2026)
Today, September 1st, 2026, this manual guides you through maximizing your Cobra 29 LX, offering detailed instructions for optimal performance and enjoyment․
Welcome to the world of Citizens Band (CB) radio! The Cobra 29 LX is a classic, robust, and user-friendly radio renowned for its reliability and performance․ This manual serves as your comprehensive guide to understanding and operating this iconic device․ Whether you’re a seasoned trucker, an off-road enthusiast, or simply looking for a reliable communication tool, the 29 LX offers a powerful and versatile solution․
This radio boasts a full array of features, including adjustable power output, noise reduction technologies, and easy channel selection․ We’ll cover everything from initial setup and basic operation to advanced features and troubleshooting․ Our goal is to empower you to confidently use your Cobra 29 LX and enjoy clear, effective communication․ Prepare to explore the capabilities of this legendary CB radio!
Unboxing and Initial Setup
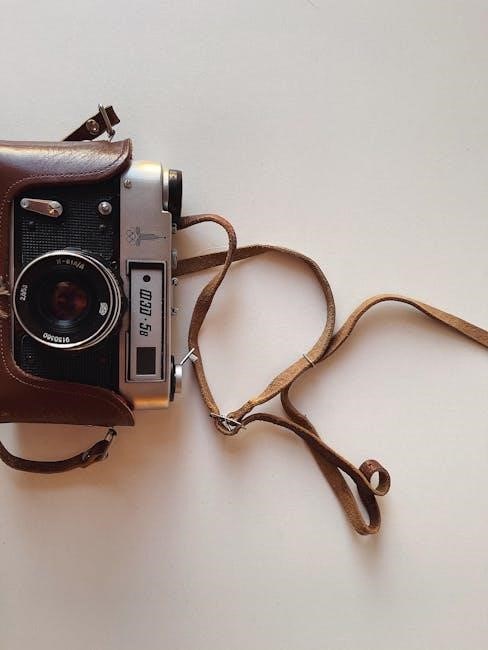
Carefully unpack your Cobra 29 LX and verify all components are present․ You should find the radio unit itself, a mounting bracket, a microphone, a power cable (typically with a cigarette lighter plug), and this user manual․ Inspect all items for any signs of shipping damage․
Before powering on, choose a suitable mounting location – secure and easily accessible․ Connect the power cable to the radio and then to a 12V DC power source․ Do not connect to a household outlet! Ensure the antenna is properly connected; a poorly connected antenna significantly impacts performance․ Finally, turn on the radio․ Initial setup involves adjusting the volume and squelch for optimal reception․ Refer to subsequent sections for detailed instructions․
Understanding the Front Panel Controls
The Cobra 29 LX’s front panel is intuitively designed for ease of use․ Key controls include the Volume/On/Off knob, which also powers the unit․ The Squelch control minimizes background noise, allowing you to hear only desired transmissions․ Channel Selection allows you to choose your operating frequency, while Fine Tune provides precise adjustments․
The Function switch activates various features like Noise Blanker and ANL (Automatic Noise Limiter)․ Indicators illuminate to show transmission and reception status․ Familiarizing yourself with these controls is crucial for effective operation․ Detailed explanations of each control’s function follow in the subsequent sections, ensuring you can confidently navigate the radio’s capabilities․

Volume and Squelch Controls
The combined Volume/On-Off knob controls both the audio output level and powers the Cobra 29 LX․ Rotating clockwise increases volume; fully counter-clockwise turns the unit off․ The Squelch control is vital for clear reception․ It filters out weak signals and background noise, preventing constant static․

Adjusting the squelch too high will block weak, but usable, signals․ Start with the squelch fully open (minimum setting) and slowly increase it until the noise disappears․ Finding the ‘sweet spot’ allows you to hear only desired transmissions; Proper adjustment of both controls ensures optimal listening experience and effective communication․
Channel Selection and Fine Tune
The Channel Selector knob allows you to navigate through the 40 available CB radio channels․ Simply rotate the knob to choose your desired channel for communication․ For precise frequency adjustments within a channel, utilize the Fine Tune control․
This is particularly useful for aligning with specific frequencies or overcoming interference․ Small adjustments to the Fine Tune knob can significantly improve signal clarity․ Be mindful of legal operating frequencies and avoid transmitting outside designated channels․ Accurate channel selection and fine-tuning are crucial for effective and compliant CB radio operation, ensuring clear communication with others․
Function Switch Explained
The Function Switch on your Cobra 29 LX activates various features, enhancing your CB radio experience․ In the ‘OFF’ position, all functions are disabled․ Selecting ‘TX’ enables transmission, allowing you to speak and broadcast․ ‘RX’ activates the receiver, enabling you to listen for incoming transmissions․
The ‘SWITCH’ position engages features like Noise Blanker and ANL (Automatic Noise Limiter) – crucial for reducing interference․ Finally, ‘VOX’ allows for hands-free operation, transmitting when it detects your voice․ Understanding each function is key to optimizing performance and tailoring the radio to your specific communication needs․ Experiment with each setting to discover the best configuration for your environment․

Microphone Usage and Connection
Proper microphone technique is vital for clear communication with your Cobra 29 LX․ The radio utilizes a standard 4-pin microphone connector; ensure a secure connection to the front panel․ Speak directly into the microphone, maintaining a distance of approximately 2-3 inches for optimal audio quality․
Avoid covering the microphone grill while speaking, as this can muffle your voice․ Press and hold the Push-to-Talk (PTT) button on the microphone to transmit․ Releasing the PTT button allows others to speak․ Consider a noise-canceling microphone for improved clarity in noisy environments․ Regular checks of the microphone connection will ensure consistent performance․

Basic Operation: Transmitting and Receiving
To transmit, first select your desired channel using the channel selector knob․ Then, press and hold the Push-to-Talk (PTT) button on your microphone while speaking clearly․ The transmit indicator light will illuminate, confirming your transmission․ Release the PTT button to listen for incoming signals․
Receiving is automatic when no one is transmitting․ Adjust the volume control to a comfortable level․ Use the squelch control to eliminate background noise; adjust until the noise just disappears․ A clear signal will break the squelch, allowing you to hear the transmission․ Practice these steps to become proficient in basic Cobra 29 LX operation․
Advanced Features: Noise Blanker & ANL
The Cobra 29 LX features both a Noise Blanker (NB) and Automatic Noise Limiter (ANL) to enhance reception in noisy environments․ The Noise Blanker aggressively reduces impulse noise like ignition interference, while the ANL smoothly limits overall background noise․
Experiment with both controls – the NB is typically more effective against sharp, intermittent noises, and the ANL for consistent static․ Adjust each control slowly, listening for improvements in signal clarity․ Overuse can distort the desired signal, so find the optimal settings for your specific conditions․ These features significantly improve communication quality․
Optimizing Noise Reduction

Achieving peak noise reduction with your Cobra 29 LX requires a systematic approach․ Begin by ensuring your antenna is properly grounded and of good quality – a poor antenna amplifies noise․ Next, incrementally adjust the Noise Blanker and ANL controls, listening for the ‘sweet spot’ where static diminishes without distorting voice clarity․
Consider the type of noise; sharp, cracking sounds respond well to the Noise Blanker, while consistent hiss benefits from the ANL․ Avoid maxing out either control, as this can negatively impact signal quality․ Fine-tuning these settings based on location and conditions is key to clear communication․
Channel Programming and Scanning
The Cobra 29 LX offers versatile channel programming and scanning capabilities․ To manually program a channel, select the desired frequency using the channel selector and fine-tune knob, then press and hold the memory button while pressing the number corresponding to the channel you wish to save it to․
Scanning allows you to quickly monitor activity across all channels․ Press the Scan button, and the radio will automatically cycle through channels with activity․ To lock onto a received signal during a scan, press the Scan button again․ Remember to consult local regulations regarding permissible channels for operation;
SWR Calibration and Adjustment
Standing Wave Ratio (SWR) is crucial for efficient transmission․ High SWR can damage your radio․ To calibrate, ensure your antenna is connected and the radio is transmitting on a low power setting․ Access the SWR calibration mode via the menu, typically by pressing the function button and navigating with the channel/volume knob․
Follow the on-screen prompts to calibrate․ A reading of 1:1 is ideal, but anything below 2:1 is generally acceptable․ If SWR is high, check antenna connections, length, and grounding․ Adjust the antenna length or use an antenna tuner to optimize SWR for best performance and radio protection․

Troubleshooting Common Issues
Experiencing problems? This section addresses frequent concerns․ No transmission often stems from a faulty microphone, incorrect wiring, or a muted transmit function – verify connections and settings․ Weak reception can be due to antenna issues, interference, or low volume․ Check antenna placement and ensure proper grounding․
Static or noise might indicate poor grounding or nearby electrical interference․ Try a different location or improve grounding․ If the radio isn’t responding, check the power supply and fuse․ Consult the full manual for detailed diagnostics and further assistance with less common issues․
No Transmission Issues
Encountering silence when you key the microphone? Several factors could be at play․ First, verify the microphone connection – ensure it’s securely plugged into the correct port․ Next, check the transmit switch on the front panel; it must be engaged․ Confirm the volume control isn’t set to minimum during transmission․
Inspect the antenna; a disconnected or damaged antenna prevents signal transmission․ Also, examine the wiring for any loose connections or breaks․ If the problem persists, test with a known working microphone to isolate the issue․ Finally, review the power supply to confirm adequate voltage is reaching the unit․
Weak Reception Problems
Experiencing faint or distorted incoming signals? Begin by adjusting the squelch control; too high a setting can block weak signals, while too low introduces static․ Verify antenna connection and condition – a properly installed and undamaged antenna is crucial for reception․ Check for interference from nearby electronic devices․
Experiment with antenna placement; height and location significantly impact signal strength․ Ensure the channel is correctly selected for the desired frequency․ If using an external amplifier, confirm its power supply and connections are secure․ Try a different antenna to rule out antenna-specific issues; Finally, consider local radio conditions and propagation․
Cobra 29 LX Specifications
Frequency Coverage: 26․965 MHz to 27․405 MHz (all 40 channels)․ Modulation Type: AM/SSB․ RF Power Output: 4 Watts AM / 12 Watts SSB․ Current Draw: 12V DC, 1․5 Amps (typical), 3 Amps (transmit)․ Microphone Type: Dynamic, 4-pin․ Dimensions: 6․8” (H) x 8․5” (W) x 7․2” (D)․
Weight: Approximately 2․2 lbs․ Operating Temperature Range: -22°F to +122°F (-30°C to +50°C)․ Antenna Impedance: 50 Ohms․ S-Meter: Signal Strength Indicator․ Noise Blanker/ANL: Integrated noise reduction circuitry․ Channel Step: 10 kHz․ PA/CB Switch: Public Address functionality․ This unit is designed for 12V negative ground systems․
FCC Regulations and Licensing
Compliance: This Cobra 29 LX complies with Part 95 of the FCC rules governing Citizen Band (CB) radio operation․ Operation without a license is permitted, however, users must adhere to all FCC regulations regarding proper usage and transmission etiquette․
Prohibited Actions: Transmitting false emergency messages, interfering with legitimate communications, and modifying the radio to exceed its specified power output are strictly prohibited․ Violations can result in substantial fines or other penalties imposed by the FCC․
Licensing: While a license isn’t required for operation, understanding FCC rules is crucial․ Further information and detailed regulations can be found on the FCC website: www․fcc․gov․ Responsible operation ensures clear communication for all users․

Safety Precautions
General Safety: Always operate the Cobra 29 LX within the specified voltage range․ Avoid exposure to extreme temperatures or moisture, as this can damage the unit․ Do not attempt to disassemble or repair the radio yourself; servicing should be performed by qualified technicians only․
RF Exposure: To ensure safety, maintain a reasonable distance from the antenna during transmission․ Excessive exposure to radio frequency (RF) energy may pose a health risk․ Use appropriate antenna mounting techniques and avoid direct contact․
Vehicle Operation: When used in a vehicle, ensure the radio is securely mounted and does not interfere with driving controls․ Prioritize safe driving practices at all times․ Disconnect power when not in use for extended periods․
Warranty Information
Limited Warranty: Cobra offers a one-year limited warranty on the Cobra 29 LX from the date of original purchase․ This warranty covers defects in materials and workmanship under normal use․ It does not cover damage resulting from misuse, accidents, modifications, or unauthorized repairs․
Warranty Service: To obtain warranty service, contact Cobra customer support with proof of purchase․ You may be required to ship the unit to an authorized service center for evaluation and repair․ All shipping costs are the responsibility of the customer․
Exclusions: This warranty is void if the unit has been altered or if the serial number has been removed or defaced․ Cobra’s liability is limited to repair or replacement, at their discretion․

Accessories and Optional Equipment
Included Accessories: Your Cobra 29 LX package includes the radio unit, a dynamic handheld microphone, a mounting bracket with screws, a power cable, and this comprehensive user manual․ These components provide a complete starting point for immediate operation․
Optional Enhancements: Expand your capabilities with optional accessories like a noise-canceling microphone for clearer transmissions, an extended-range antenna for improved reception, and a PA speaker for public address functionality․ Consider a mobile antenna kit for vehicle mounting․
Availability: These accessories are available for purchase at most electronics retailers and online through the Cobra website․ Ensure compatibility before purchasing any third-party equipment․
Frequently Asked Questions (FAQ)
Q: My radio isn’t transmitting, what should I do? A: Verify the microphone is securely connected, the power is on, and the transmit switch is activated․ Check antenna connection and SWR readings․
Q: How do I improve weak reception? A: Ensure the antenna is properly connected and tuned․ Adjust the RF Gain and Squelch controls․ Consider an external antenna for better signal strength․
Q: What does the Squelch control do? A: It silences weak signals and background noise․ Adjust it to the lowest setting that eliminates noise without blocking desired transmissions․
Q: Is a license required to operate this radio? A: Yes, operating a CB radio generally requires an FCC license․ Please refer to the FCC Regulations section for details․