Fiber laser marking relies on precise parameters for optimal results; understanding these settings is crucial for achieving desired engraving depths and contrast levels.
Overview of Laser Marking with Fiber Lasers
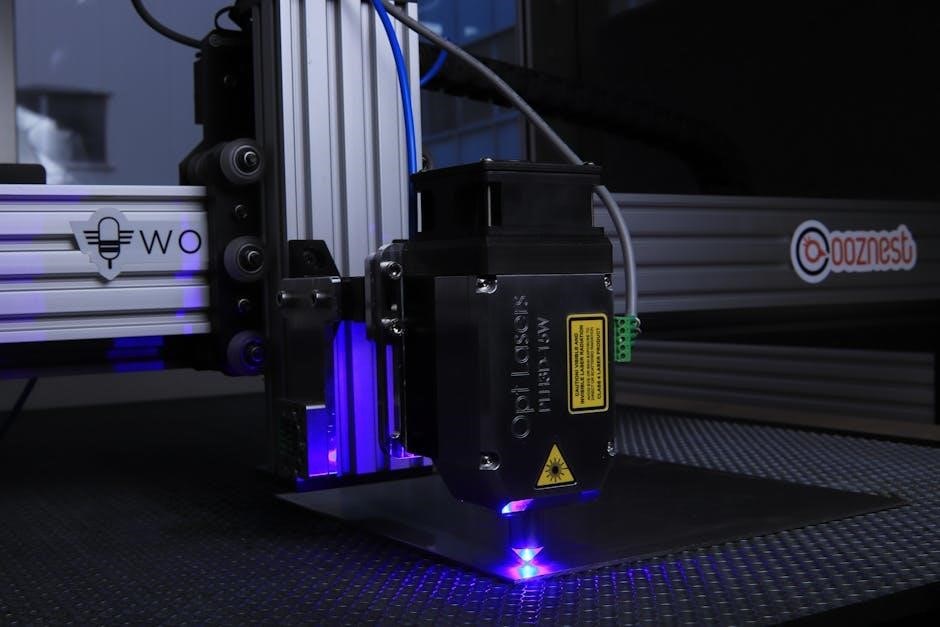
Fiber laser marking represents a sophisticated, non-contact process utilizing a focused laser beam to permanently alter the surface of a material. Unlike traditional methods, fiber lasers offer exceptional precision, enabling intricate designs and high-resolution markings on diverse substrates like metals, plastics, and ceramics.
The core principle involves directing a high-energy laser beam onto the material’s surface, causing localized heating and subsequent ablation, vaporization, or chemical alteration. This process creates visible contrast, forming the desired mark. Fiber lasers excel due to their compact size, high beam quality, and reliability, making them ideal for industrial applications.
Modern systems, such as those from FOBA Laser Marking & Engraving, demonstrate capabilities for grayscale marking on security documents, highlighting the technology’s versatility. Jinhaitron oscillators contribute to the speed and precision, achieving resolutions down to 1 micron. Understanding the interplay of key parameters is vital for maximizing the effectiveness of this technology.
Key Factors Influencing Marking Results
Several interconnected factors significantly impact the quality and consistency of fiber laser marking. Laser power, a primary determinant, dictates marking depth and contrast; higher power generally yields deeper marks but can also increase the heat-affected zone. Marking speed must be balanced with power – faster speeds reduce heat input, potentially sacrificing depth, while slower speeds enhance it.
Frequency plays a crucial role in controlling heat accumulation. Pulse width governs material ablation, influencing the smoothness and precision of the mark. Furthermore, fill density and hatch spacing determine coverage area and mark appearance. The number of passes directly correlates with marking depth, allowing for layered effects.
Material properties are paramount; stainless steel, aluminum, and plastics each require unique parameter adjustments. Proper focusing and alignment, aided by red light positioning, are essential for optimal beam delivery and consistent results. Cleanliness of the lens, as emphasized in alignment guides, is also critical for maintaining precision.
Importance of Parameter Optimization

Parameter optimization is paramount in fiber laser marking, directly influencing marking quality, speed, and repeatability. Incorrect settings can lead to insufficient contrast, excessive material removal, or damage to the workpiece. Achieving the ideal balance between laser power, speed, frequency, and other parameters ensures consistent, high-resolution marks.
Optimized parameters minimize the heat-affected zone (HAZ), preserving material integrity and preventing unwanted side effects like discoloration or distortion. Precise control also reduces cycle times, boosting production efficiency. Material-specific parameter sets are crucial, as each substance responds differently to laser energy.
Furthermore, proper optimization extends the lifespan of the laser system and its components. Regularly reviewing and adjusting parameters based on material changes or desired mark characteristics is essential for maintaining optimal performance and achieving consistently superior results. Careful calibration and testing are key.
Core Laser Marking Parameters
Laser power, marking speed, and frequency are fundamental controls; these core settings dictate marking depth, contrast, and the overall quality of the engraving process.
Laser Power: Defining Marking Depth and Contrast
Laser power is arguably the most influential parameter in fiber laser marking, directly correlating with both the depth of the engraving and the resulting contrast. Higher power settings generally lead to deeper marks and increased contrast, effectively ablating more material. However, exceeding optimal power levels can induce undesirable effects, such as excessive heat-affected zones (HAZ), material distortion, or even damage.
Conversely, lower power settings produce shallower marks with reduced contrast, suitable for delicate materials or applications requiring subtle marking. A typical power range for stainless steel marking, as noted, falls between 30-50 watts, contingent on the machine’s capacity and the specific alloy. Careful calibration is essential; increasing power or decreasing speed will deepen the mark. Finding the sweet spot requires experimentation, balancing desired aesthetics with material integrity. The machine’s maximum power capability must always be considered during parameter selection.
Marking Speed: Balancing Speed and Quality
Marking speed represents a critical trade-off between processing time and the quality of the laser engraving. Faster speeds enhance productivity, allowing for quicker completion of marking tasks, but often compromise resolution and depth. Slower speeds, conversely, yield finer details and deeper engravings, but significantly extend processing times.
Optimal speed selection depends heavily on the material being marked, the desired marking depth, and the complexity of the design. Parameters often include recommended work speeds in mm/min, which serve as a starting point for calibration. Increasing speed while maintaining consistent power can result in a lighter mark, while decreasing speed deepens the engraving. Achieving a balance requires careful consideration of these factors, ensuring the final product meets both aesthetic and functional requirements. Precise control over speed is vital for consistent, high-quality results.
Frequency: Impact on Heat Affected Zone (HAZ)
Laser frequency, measured in Hertz (Hz), significantly influences the Heat Affected Zone (HAZ) during fiber laser marking. Higher frequencies deliver more pulses per second, reducing the pulse energy and minimizing heat buildup in the material. This results in a smaller HAZ, crucial for delicate materials or applications where thermal distortion is undesirable.
Conversely, lower frequencies increase pulse energy, leading to a larger HAZ and potentially causing material melting or unwanted changes in its properties. The ideal frequency depends on the material’s thermal conductivity and absorption characteristics. Careful adjustment of frequency, alongside power and speed, allows for precise control over the marking process, minimizing thermal stress and ensuring the integrity of the marked component. Understanding this relationship is key to achieving clean, accurate, and durable laser markings.
Advanced Laser Marking Parameters
Advanced parameters, like pulse width, fill density, and passes, refine marking precision and depth, enabling intricate designs and specialized material processing.
Pulse Width: Controlling Material Ablation
Pulse width, measured in nanoseconds, significantly influences the ablation process during fiber laser marking. Shorter pulse widths deliver energy rapidly, minimizing heat affected zones (HAZ) and enabling precise, high-resolution marking, particularly beneficial for sensitive materials like plastics. Conversely, longer pulse widths distribute energy over a larger timeframe, increasing heat input and promoting deeper material removal, ideal for applications requiring substantial engraving depth on metals like stainless steel.
Optimizing pulse width involves balancing the need for precision with the desired marking depth. Too short a pulse may not effectively ablate the material, resulting in a faint mark, while an excessively long pulse can cause unwanted thermal effects, such as discoloration or deformation. Careful adjustment, often in conjunction with other parameters like laser power and speed, is essential to achieve optimal results. Experimentation and material-specific testing are key to determining the ideal pulse width for each application.
Fill Density/Hatch Spacing: Achieving Desired Coverage
Fill density, often controlled by adjusting the hatch spacing, dictates the coverage and darkness of a laser-marked area. Lower hatch spacing values create denser patterns, resulting in darker, more filled-in markings, suitable for applications requiring high contrast or complete material removal. Conversely, higher hatch spacing values produce lighter, more spaced-out markings, ideal for subtle effects or when minimal material ablation is desired.
The optimal fill density depends heavily on the material, laser power, and desired aesthetic. For instance, achieving a solid black mark on aluminum may necessitate a very low hatch spacing, while a light etching on plastic could benefit from a higher value. Fine-tuning hatch spacing allows for precise control over the visual appearance and depth of the marking, enabling the creation of intricate designs and varying levels of coverage. Careful consideration of these parameters is crucial for consistent and high-quality results.
Number of Passes: Increasing Marking Depth
The number of passes directly influences the marking depth achieved with a fiber laser. Each pass represents one complete scan of the laser beam across the material surface. Increasing the number of passes incrementally ablates more material with each subsequent scan, leading to a deeper and more pronounced mark. However, simply increasing passes isn’t always the solution; it can also increase processing time and potentially widen the Heat Affected Zone (HAZ).
Optimizing the number of passes requires balancing desired depth with efficiency and material integrity. For shallow markings, a single pass might suffice, while deeper engravings necessitate multiple passes. Parameters like laser power and speed must be adjusted in conjunction with the number of passes to prevent overheating or excessive material removal. Careful experimentation and testing are vital to determine the ideal number of passes for a specific material and application, ensuring both quality and productivity.
Material-Specific Parameter Considerations
Fiber laser settings must be tailored to each material; stainless steel, aluminum, and plastics each require unique power, speed, and frequency adjustments for optimal marking.
Stainless Steel Marking Parameters
Achieving high-contrast marks on stainless steel typically requires a balance between laser power, speed, and frequency. Generally, a power range of 30-50 watts is recommended, contingent upon the specific steel alloy and desired marking depth. Lower speeds, around 800-1200 mm/min, often yield deeper engravings, while higher speeds (up to 2000 mm/min) are suitable for surface marking or etching.
Frequency plays a vital role in minimizing the Heat Affected Zone (HAZ). Higher frequencies (20kHz ─ 100kHz) are often preferred for finer details and reduced thermal impact, particularly with thinner stainless steel sheets. Multiple passes can further enhance marking depth and clarity. Careful consideration of these parameters is essential to avoid discoloration or material distortion. Experimentation and testing are crucial to determine the optimal settings for your specific application and stainless steel grade.
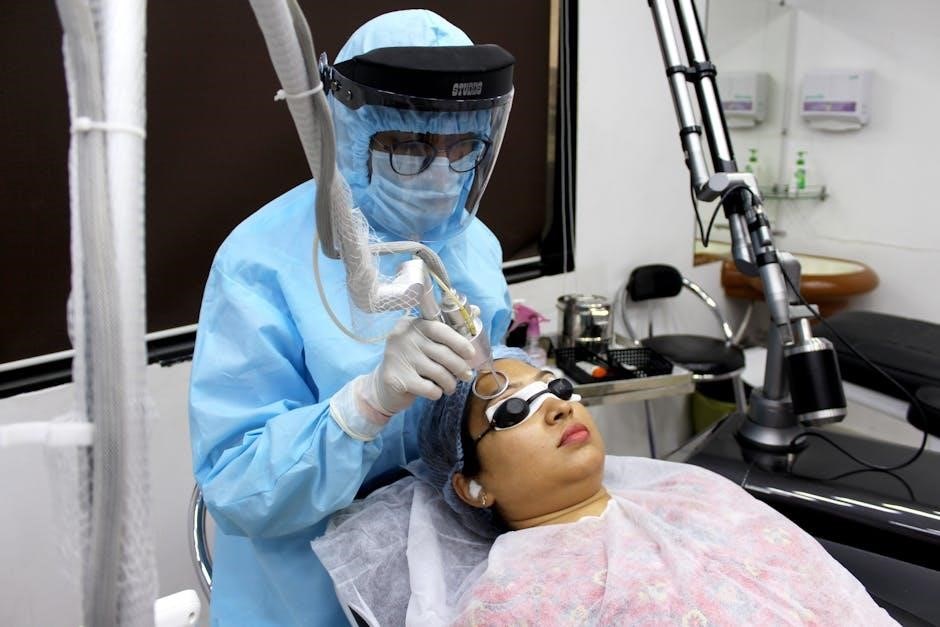
Remember to always prioritize safety and wear appropriate eye protection when operating a fiber laser.
Aluminum Marking Parameters
Marking aluminum with a fiber laser demands careful parameter selection due to its reflective nature and thermal conductivity. Lower laser power settings, typically between 20-40 watts, are often sufficient to achieve clear contrast without excessive heat buildup. Marking speeds generally range from 1000-1800 mm/min, depending on the desired marking depth and aluminum alloy.
Higher frequencies (above 30kHz) are generally recommended for aluminum to create a finer, more precise mark and minimize the risk of material warping. Utilizing a fill density or hatch spacing adjustment can help control the coverage and darkness of the marking. Multiple passes can be employed to increase marking depth, but caution should be exercised to avoid overheating.
Pre-treating the aluminum surface with a suitable coating can significantly improve marking contrast and adhesion. Always prioritize safety and wear appropriate eye protection.
Plastic Marking Parameters
Fiber laser marking of plastics requires nuanced parameter control to avoid melting, charring, or deformation. Lower laser power, typically ranging from 10-30 watts, is crucial, alongside faster marking speeds – often between 2000-4000 mm/min – to minimize heat absorption. Frequency settings around 20-50 kHz generally yield optimal results, depending on the plastic type.
Due to the varying compositions of plastics, experimentation is key. Adjusting fill density/hatch spacing allows for control over mark darkness and coverage. For deeper marks, multiple passes at reduced power are preferable to a single high-power pass. Some plastics benefit from pre-treatment with laser-marking additives to enhance contrast.
Always test on scrap material first to determine the ideal settings for the specific plastic being used, and prioritize proper ventilation to manage any fumes produced during the process.
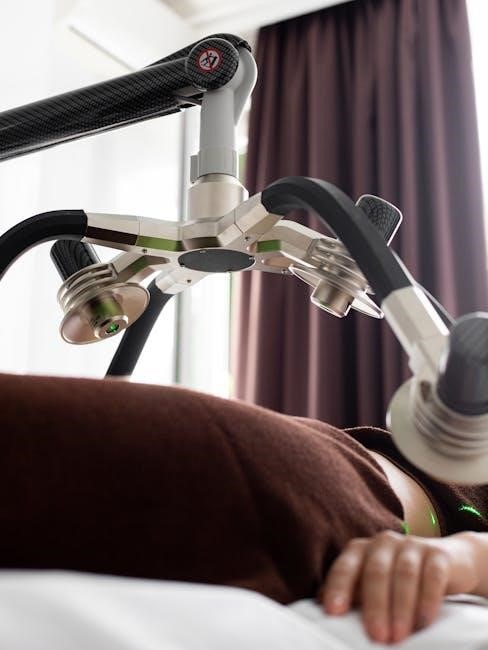
Focusing and Alignment for Optimal Results
Precise focus positioning and red light alignment are essential for consistent, high-quality fiber laser marking, ensuring accurate previewing and optimal engraving.
Importance of Proper Focus Position
Achieving a precise focus position is paramount for successful fiber laser marking. The laser beam converges to its smallest spot size at the focal point, delivering maximum energy density. Incorrect focusing leads to blurred marks, inconsistent depth, and reduced marking quality. A properly focused beam ensures clean ablation and optimal contrast, particularly crucial for detailed engravings and intricate designs.
Maintaining the correct focus distance, often measured in millimeters, is vital. Variations in workpiece height or surface irregularities necessitate adjustments to the laser head’s Z-axis position. Regularly cleaning the lens is also essential, as contaminants can distort the beam and affect focus accuracy. The ideal focus position depends on the material, laser power, and desired marking effect; experimentation and careful observation are often required to determine the optimal setting for each application. Accurate focusing directly translates to improved marking precision and repeatability.
Red Light Positioning for Previewing
Many fiber laser marking machines incorporate a red light diode for previewing the marking area before the laser engages. This feature is invaluable for accurate positioning and alignment of graphics or text on the workpiece. The red light projects a visible outline of the intended mark, allowing operators to verify placement and scale without risking material damage or wasted processing time.
This preview function is especially useful for complex designs or when working with expensive materials. It enables precise adjustments to the marking position, rotation, and size before initiating the laser process. Proper alignment with the red light ensures the final mark will be exactly where intended. Remember to confirm the red light is accurately calibrated with the laser beam path for reliable previewing. Utilizing this feature significantly enhances efficiency and minimizes errors in the fiber laser marking process.